
Construction Photo Documentation: A Complete Guide
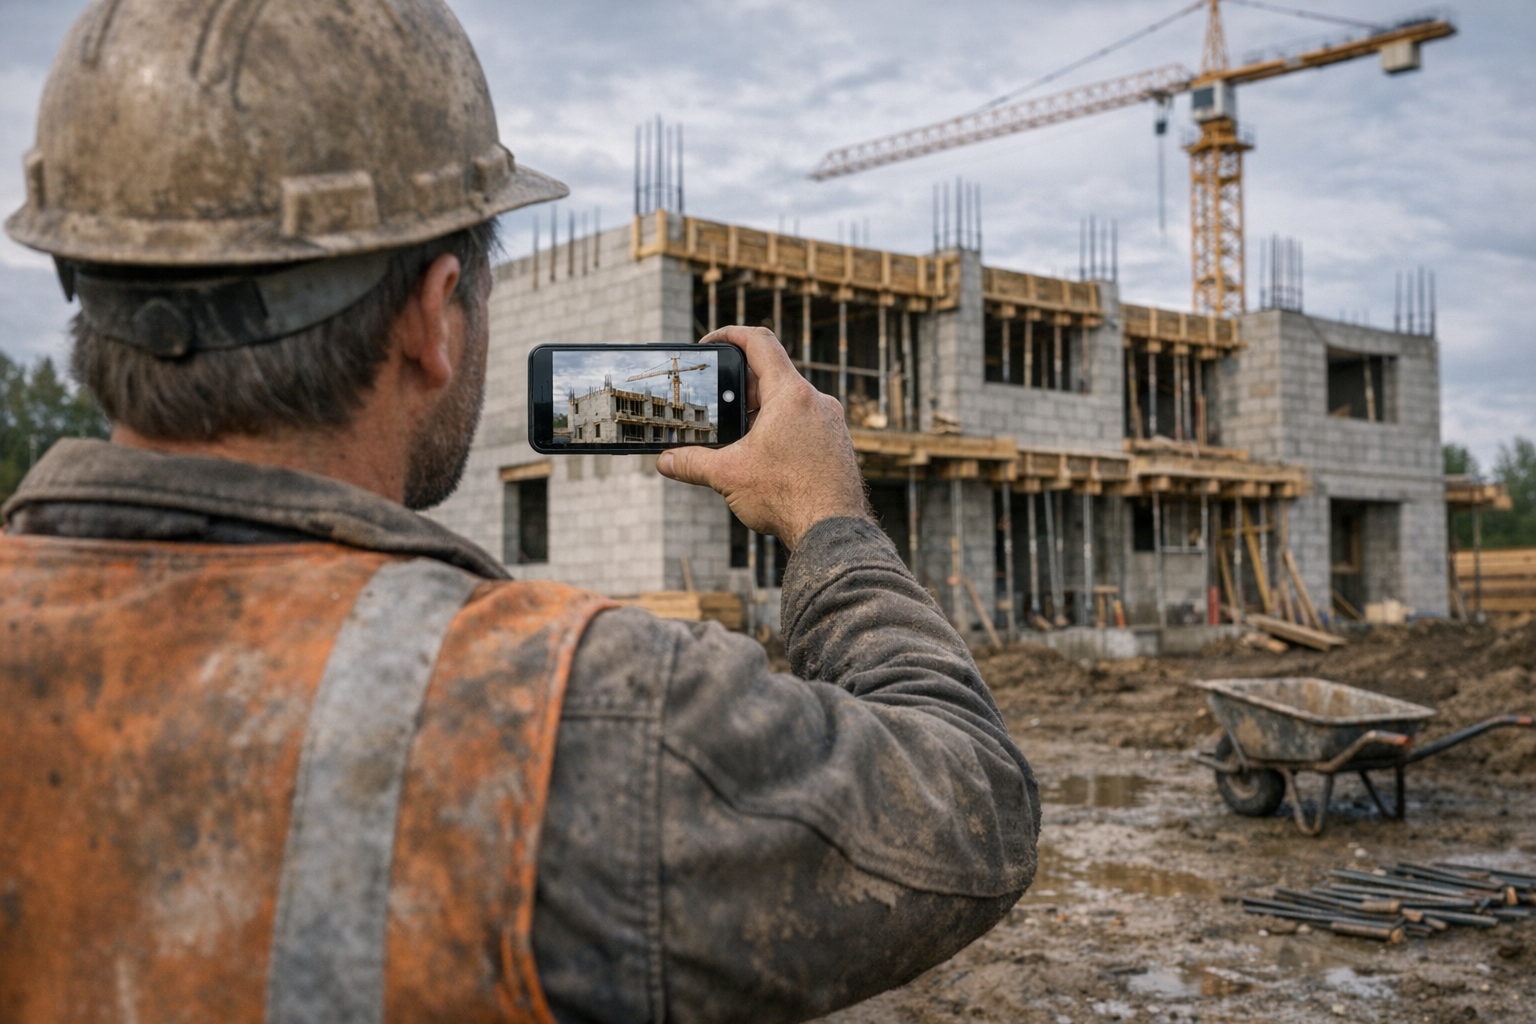
Every construction project tells a story through its photos, if someone bothers to take them properly. Yet most construction photo documentation is an afterthought. Builders snap a few random shots when they remember, dump them into a camera roll with 500 holiday photos, and hope they can find the right image six months later when a question comes up.
That approach fails every time.
Good photo documentation doesn’t require expensive equipment or photography skills. It requires a system: knowing what to photograph, when to photograph it, and how to organize the results so they’re actually useful later.
This guide gives you that system. Whether you’re a homeowner building your first house or a site manager running commercial projects, you’ll walk away knowing exactly how to create a photo record that protects you legally, keeps stakeholders informed, and captures your build for good.
Site Diary AI organizes your site photos into a searchable timeline. AI describes every image automatically, so you can find any photo instantly, even months later.
Try It Free →Why Photo Documentation Matters More Than You Think
You might assume a well-written site diary is enough. It’s not. Written descriptions and photos serve completely different purposes, and you need both.
A diary entry says: “Hairline crack observed in foundation wall section B, east side.”
A photo shows: the exact crack, its length, its width relative to a ruler held beside it, the surrounding context, the date stamp, all in a single glance.
In disputes, insurance claims, and compliance audits, photos carry weight that text alone cannot match:
- Legal evidence: Courts accept timestamped photos as contemporaneous evidence. A photo from the day of the incident is far more persuasive than a written account produced weeks later.
- Defect tracking: Photos show progression. Was that crack 2 mm last month? Compare the photos. No written description is that precise.
- Handover documentation: When you hand a building over to the client, a complete photo record from every phase demonstrates the quality of work performed behind walls that are now sealed.
- Memory preservation: Six months into a build, you won’t remember what the plumbing layout looked like before the slab was poured. Your photos will.
The best time to start taking site photos was on day one. The second best time is today.
What to Photograph: A Phase-by-Phase Guide
The biggest mistake in construction photography isn’t taking bad photos. It’s not knowing what to photograph. Every phase of construction has elements that will be hidden, sealed, or covered up within days. Once they’re gone, they’re gone.
Here’s what to capture at every major phase:
Site Preparation & Earthworks
This phase establishes the baseline. Everything that follows builds on what happens here.
- The empty site before any work begins (from multiple angles)
- Survey markers and setout pegs showing building position
- Excavation depth and dimensions with a measuring rod or level staff for scale
- Soil conditions: especially if unexpected (rock, water table, contamination)
- Drainage and stormwater infrastructure before backfill
- Compaction testing setup and results board (if visible)
- Access roads and staging areas: their condition at the start protects you if the neighbor claims you damaged their driveway
💡 Why this matters: Earthworks are completely invisible once the foundation goes in. If a drainage problem appears two years later, your pre-construction photos are the only proof of what was installed and where.
Foundation & Substructure
Foundations are the most legally sensitive phase to document. Defects here are catastrophic and nearly impossible to inspect after the fact.
- Formwork before the pour: dimensions, alignment, bracing
- Reinforcement (rebar) layout before concrete is poured: steel diameter, spacing, cover depth, lap lengths
- Pre-pour inspections: capture the inspector’s visit, sign-off board, or approval documents
- The pour itself: concrete delivery (truck number, batch ticket visible if possible), placement, vibration
- Finished surface: level, quality, any visible defects
- Waterproofing and membranes before backfill
💡 Critical: Rebar photos are some of the most important images you’ll ever take on a construction project. Once concrete is poured, there is no way to verify what’s inside without destructive testing. Photograph rebar from multiple angles, with a tape measure for scale.
Structural Framing
The skeleton of the building is fully visible for a brief window. Once cladding goes on, you can’t see it anymore.
- Framing layout: overall structure, floor by floor
- Connections and joints: bolt patterns, welding, brackets, tie-downs
- Bracing: temporary and permanent
- Floor systems: joists, trusses, blocking
- Any modifications to the original plans: capture both the change and any written approval
Rough-In Services (Before Walls Close)
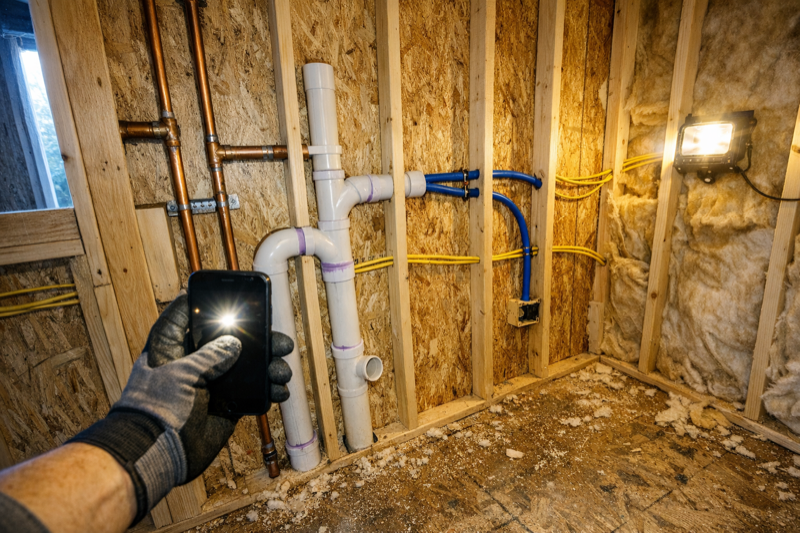
This is the last chance to see what’s behind the walls. After plasterboard or plaster goes on, everything is hidden for the life of the building.
- Electrical wiring runs, junction boxes, switch and outlet positions
- Plumbing: pipe routes, material types, connections, shut-off valve locations
- HVAC ductwork: routing, insulation, connections to units
- Insulation: type, thickness, coverage, vapor barrier installation
- Fire stopping: penetrations through fire-rated walls and floors
Take overview shots showing the full wall or ceiling cavity, then close-ups of individual connections and junctions.
Exterior Envelope
The building starts to look finished from the outside. Document the quality and condition of every exterior element.
- Wall cladding or render: installation stages, material quality
- Roofing: underlayment, flashing details, ridge and valley work, completed surface
- Windows and doors: installation, sealing, flashing around openings
- Balconies and decks: waterproofing layers before tiling or decking
Interior Finishing
Less critical legally but valuable for handover documentation and warranty claims.
- Plastering and drywall: before painting, showing finish quality
- Tiling: layout, grout lines, waterproofing (especially wet areas)
- Cabinetry and joinery: installation quality, alignment
- Flooring: before furniture is placed
- Paint and final finishes: the completed state of every room
External Works & Handover
The final phase. Document the completed building and surroundings.
- Landscaping: grading, drainage, planting
- Driveways, paths, and fencing: finished condition
- Completed building from the same angles used in your drone timelapse overview shots
- Defects list items: photograph each one before and after rectification
How to Take Effective Site Photos
Knowing what to photograph is half the battle. The other half is taking photos that are actually useful: clear, informative, and identifiable months later.
1. Always Include Context
A close-up of a crack means nothing without context. Where in the building is it? Which wall? Which floor?
The two-shot rule: For every detail photo, take a wider context shot first. Photograph the overall wall, then zoom in on the specific area. When reviewing photos later, the context shot tells you exactly where the detail lives.
2. Include Scale References
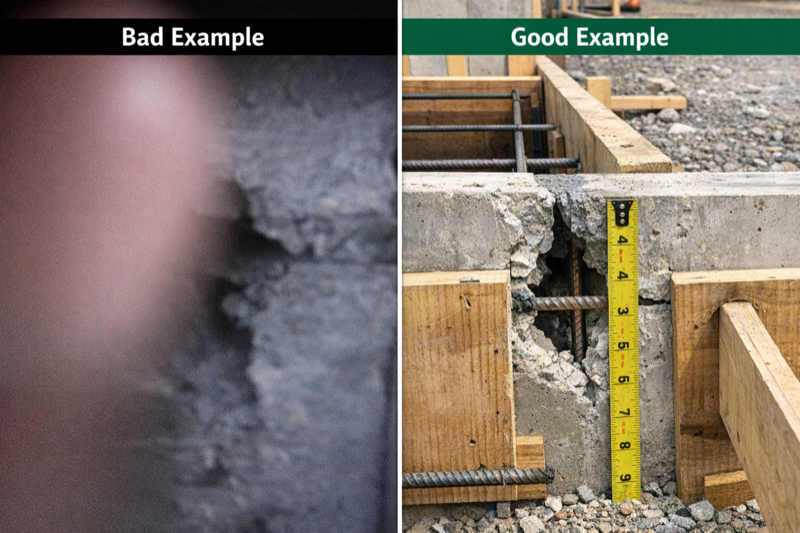
Without something for scale, a photo of a pipe could be 20 mm or 200 mm in diameter. Always include a reference:
- A tape measure or ruler held beside the subject
- A common object (hard hat, brick, pen) for rough scale
- Your hand (not ideal, but better than nothing)
This is especially important for defects, reinforcement spacing, and material dimensions.
3. Shoot in Adequate Light
Dark, blurry photos are useless. Construction sites aren’t photography studios, but you can improve your results dramatically:
- Use your phone’s flash in enclosed spaces (it’s better than a dark photo)
- Open doors and windows to let in natural light before shooting interiors
- Carry a small flashlight for inspecting and photographing cavities, conduits, and tight spaces
- Wait for the flash to recycle before taking the next shot: rapid-fire photos in dark spaces often produce motion blur
4. Capture Labels, Tags, and Markings
Photograph every label, inspection tag, delivery ticket, and marking you see:
- Concrete batch tickets on the truck
- Steel grade markings on rebar
- Insulation R-value labels
- Inspector sign-off tags
- Material safety data sheets
These are easy to miss but incredibly valuable for compliance records.
5. Take More Photos Than You Think You Need
Storage is free. Your time revisiting the site isn’t. It takes three seconds to take an extra photo. It costs hours (or becomes impossible) to go back and get a shot you missed once the work is covered up.
A good rule of thumb: if you’re wondering whether something is worth photographing, it is.
The Most Common Photo Documentation Mistakes
❌ Mistake 1: No system at all
Random photos dumped into the camera roll. No dates, no labels, no organization. Three months later, you’re scrolling through 2,000 photos trying to find the one that shows the rebar layout in the west wall.
Fix: Use a dedicated app or folder structure. Organize by date and phase from day one.
❌ Mistake 2: Only photographing problems
Many builders only reach for the camera when something goes wrong. This creates a biased, incomplete record. You also need photos of things done correctly: they prove quality workmanship and serve as your evidence in warranty disputes.
Fix: Make photo documentation part of the daily routine, not just an emergency response.
❌ Mistake 3: Photos without timestamps
A photo without a verifiable date is almost worthless as evidence. “I took this photo on March 15th” is your word against theirs. A timestamped photo with embedded EXIF data is objective proof.
Fix: Ensure your phone’s date and time are correct. Most phone cameras embed EXIF timestamps automatically.
❌ Mistake 4: Only wide shots or only close-ups
All overview photos and no details? You can see the building but not the defect. All close-ups and no context? You can see the crack but not which wall it’s on.
Fix: Use the two-shot rule: context first, then detail.
❌ Mistake 5: Keeping photos only on one device
Your phone gets lost, stolen, or dropped into a foundation trench. All your documentation goes with it.
Fix: Back up to the cloud immediately. Upload photos to a project management tool at the end of every day, or better, use an app that syncs in real time.
Organizing Your Photos: From Chaos to System
Taking hundreds of good photos is pointless if you can’t find them when needed. Organization separates professional documentation from a useless photo dump.
Folder Structure (For Manual Organization)
If you’re organizing photos on a computer or cloud drive, use a consistent structure:
ProjectName/
├── 01_Site-Preparation/
│   ├── 2026-03-15_empty-site/
│   ├── 2026-03-18_excavation/
│   └── 2026-03-22_drainage/
├── 02_Foundation/
│   ├── 2026-04-01_formwork/
│   ├── 2026-04-03_rebar/
│   └── 2026-04-05_pour/
├── 03_Framing/
├── 04_Rough-In/
├── 05_Exterior/
├── 06_Interior/
└── 07_Completion/
File Naming Convention
Rename files from IMG_4872.jpg to something meaningful:
2026-04-03_foundation_rebar-east-wall_01.jpg
2026-04-03_foundation_rebar-east-wall_02.jpg
2026-04-05_foundation_pour_batch-ticket.jpg
Pattern: DATE_PHASE_DESCRIPTION_SEQUENCE.jpg
This makes every photo findable through a simple file search, no scrolling through thousands of thumbnails.
The Reality Check
Let’s be honest: most people don’t maintain a folder structure. Renaming hundreds of files is tedious. Construction professionals are busy. Homeowners are overwhelmed.
This is exactly the problem that digital tools solve.
From Phone Gallery to Searchable Timeline
Managing construction photos with folders and manual file naming works in theory. In practice, it breaks down within the first two weeks. You’re on site, it’s raining, you’ve got a subcontractor asking questions, and the last thing on your mind is renaming IMG_5291.jpg to 2026-04-03_foundation_rebar-east-wall_01.jpg.
Site Diary AI handles all of this automatically:
- 📸 Photo timeline: Every photo you take goes into a chronological project timeline, organized by date. No folders, no renaming, no sorting.
- 🤖 AI image descriptions: AI analyzes each photo and generates a written description: “Rebar installation in east foundation wall, 12mm bars at 200mm spacing.” You didn’t type a word.
- 🔍 Full-text search: Need to find every photo of rebar in the east wall? Search “rebar east wall” and they appear instantly. Search across hundreds of photos in seconds.
- 📅 Automatic dates: Every photo is timestamped and placed on the correct day in the timeline. No EXIF anxiety.
- 📄 AI daily reports: At the end of the day, AI compiles your photos, notes, and weather data into a professional PDF report. Rearranging this manually would take an hour. AI does it in seconds.
- 🎬 Timelapse sequences: Your regular site photos can be assembled into visual progress timelapses, shareable with clients via a link.
The result: complete, searchable, organized photo documentation that requires zero manual filing.
Upload photos to a searchable timeline, let AI describe and organize them, and generate professional daily reports automatically. Your first project is free, no credit card required.
Start Free →Construction Photo Checklist
Use this quick-reference checklist on site. If you photograph everything on this list, you’ll have comprehensive documentation for any phase:
| Category | What to Photograph |
|---|---|
| Before work starts | Empty site from 4+ angles, survey markers, existing conditions |
| Excavation | Depth with scale reference, soil conditions, drainage installation |
| Foundation | Formwork, rebar layout (close-up + overview), pour in progress, finished surface |
| Framing | Overall structure, connections/joints, bracing, modifications |
| Rough-in services | Electrical runs, plumbing routes, HVAC, insulation, fire stopping |
| Exterior | Cladding stages, roofing layers, window/door sealing, waterproofing |
| Interior | Wall finishes, tiling (especially wet areas), cabinetry, flooring |
| Inspections | Inspector on site, sign-off tags, test results, approval documents |
| Deliveries | Material on arrival, batch tickets, quantity and condition |
| Defects | Crack/defect with ruler for scale, context shot, before and after repair |
| Completion | Every room finished, external works, handover condition |
Conclusion
Construction photo documentation isn’t complicated. It’s a habit. Photograph every phase, especially the work that will be hidden. Include scale references and context. Organize by date and phase. Back up immediately.
The photos you take today are the evidence, the proof of quality, and the memory of your build for years to come. A five-second photo can save you five months of legal headaches.
Start with the checklist above. Record everything in your site diary. And when you’re ready to stop wrestling with folders and file names, try Site Diary AI free, and let AI organize your construction photos for you.
Every photo you don’t take is documentation you’ll wish you had.